Google Tag Manager Integration
The VisitorAPI Google Tag Manager Custom Template is available in the GTM Template Gallery. It fetches visitor data and pushes it to the GTM data layer, making it available to all tags and triggers.
Source and issue tracker: github.com/visitorapi/visitor-api-google-tag-manager
Step 1: Import VisitorAPI tag template
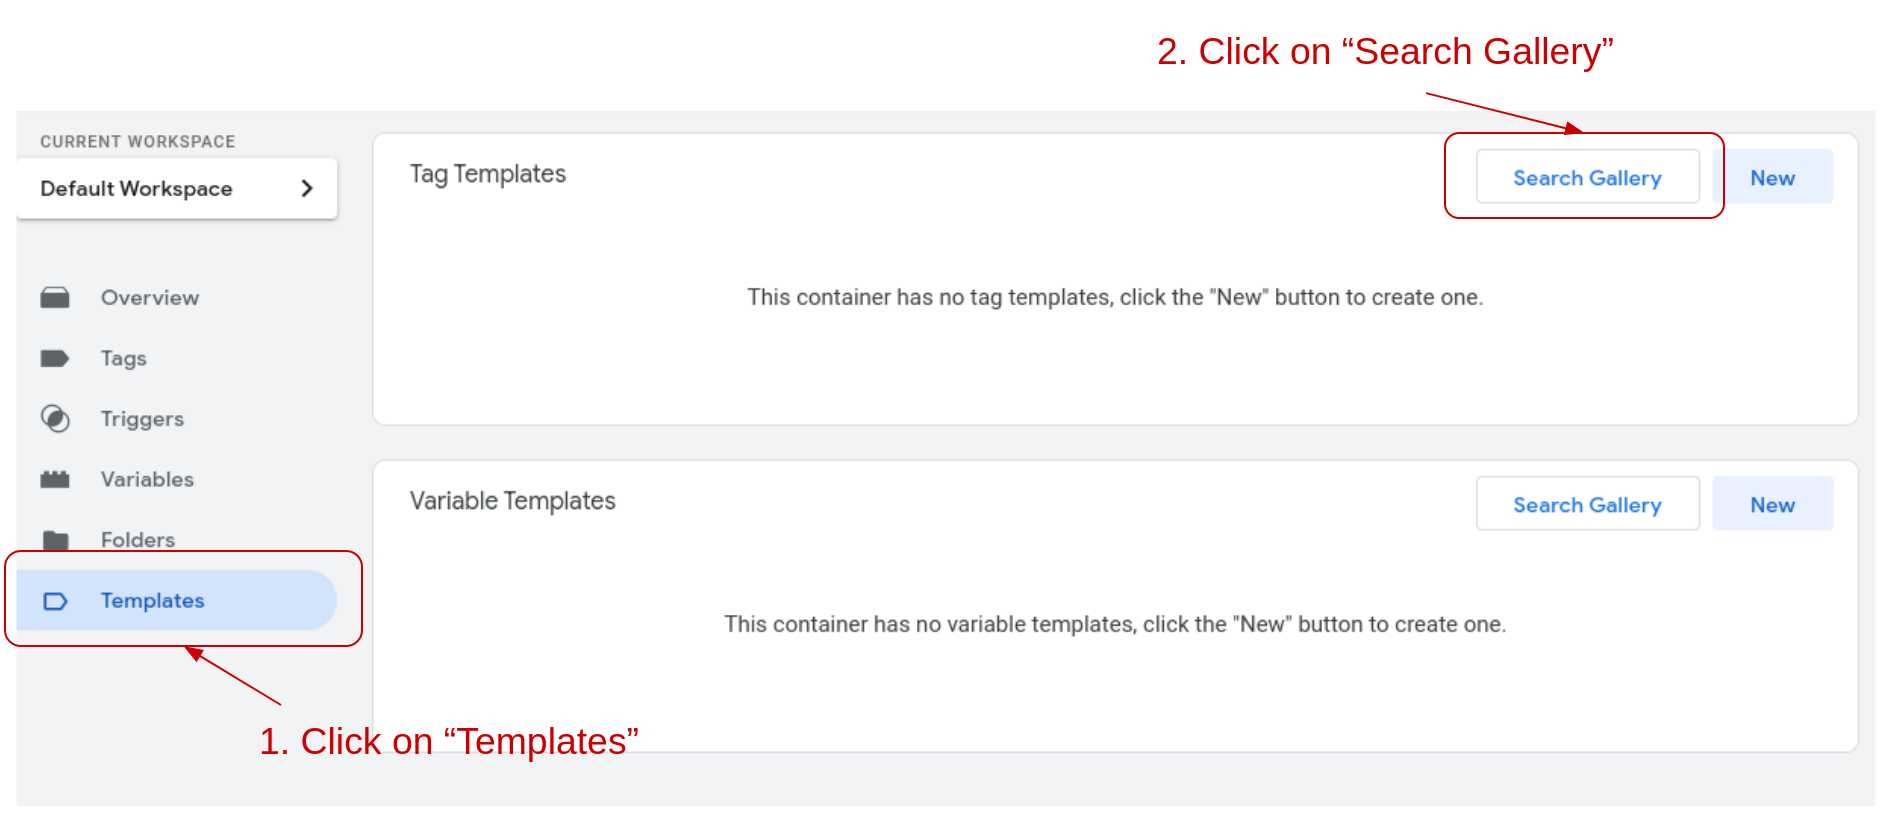
First, in Google Tag Manager workspace, click on “Templates”, then click on “Search Gallery” as the instructions below:
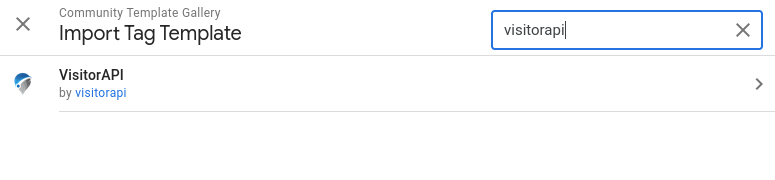
Search for VisitorAPI and you will find the VisitorAPI from us.
Import the VisitorAPI tag template into your Google Tag Manager workspace.
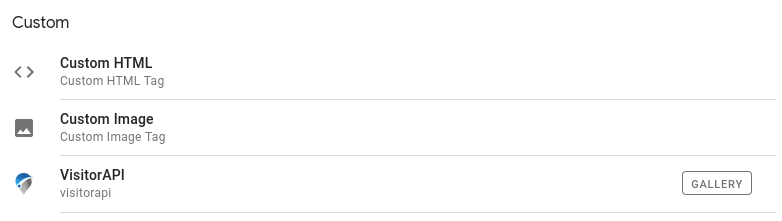
Step 2: Create a VisitorAPI tag
Create a new tag in the Google Tag Manager workspace, and select VisitorAPI under “Custom” as the tag type.
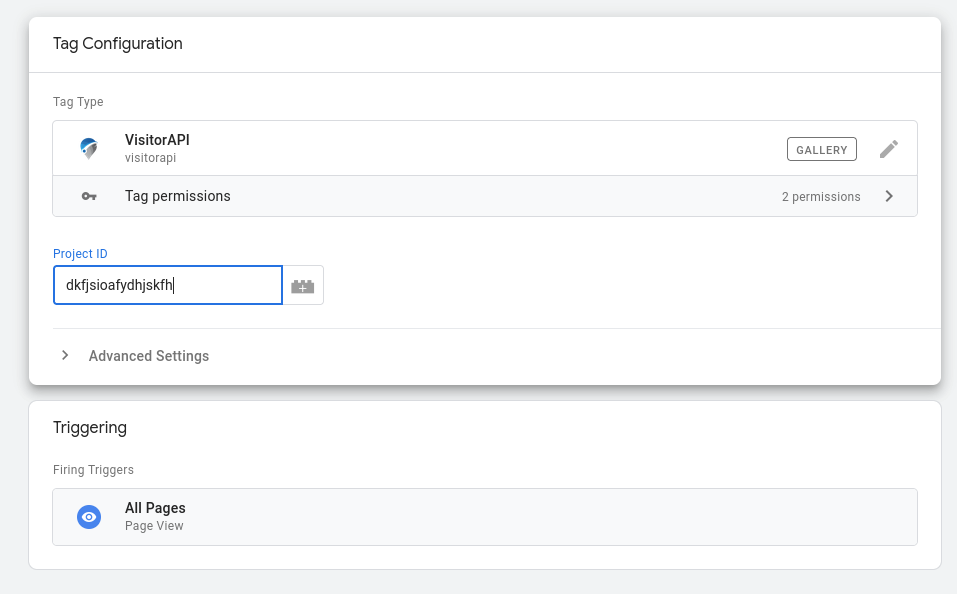
You will need your VisitorAPI project ID from the VisitorAPI project dashboard. Copy and paste the ID to the Project ID field in the VisitorAPI tag configurations, and set the triggering condition as the pages you will need the location and device data for other tags.
The VisitorAPI tag will fetch the visitor’s location and device data and push the data into the dataLayer.
Step 3: Create Google Tag Manager variables
To use the data, create variables in Google Tag Manager to map the data in dataLayer. When creating the variables, choose Data Layer Variable, then map the new variable to one of the data layer variable created by the VisitorAPI tag. The example below maps the visitorApiCountryCode to “Country Code”
Here is a list of all the data layer variables created by the VisitorAPI tag:
| Suggested Variable Name | Data Layer Variable Name | Description |
|---|---|---|
| IP Address | visitorApiIpAddress | The IP address of the visitor. |
| Country Code | visitorApiCountryCode | Country from which the visitor is located in as an ISO 3166-1 alpha-2 country code. |
| Country Name | visitorApiCountryName | The full name of the country which the visitor is located in. |
| Currencies | visitorApiCurrencies | An array of the official currencies of the country which the visitor is located in. |
| Languages | visitorApiLanguages | An array of the official languages for the visitor’s country. |
| Region | visitorApiRegion | Name of the region, state or province which the visitor is located in. The complete list of valid region values is found in the ISO-3166-2 standard. |
| City | visitorApiCity | Name of the city which the visitor is located in. |
| City LatLong | visitorApiCityLatLong | Latitude and longitude of the city which the visitor is located in. |
| Browser | visitorApiBrowser | The browser name which the visitor uses. |
| Browser Version | visitorApiBrowserVersion | The browser version which the visitor uses. |
| Device Brand | visitorApiDeviceBrand | The brand of the device which the visitor uses. Only applicable to mobile devices. |
| Device Model | visitorApiDeviceModel | The model of the device which the visitor uses. Only applicable to mobile devices. |
| Device Family | visitorApiDeviceFamily | The family of the device which the visitor uses. Only applicable to mobile devices. |
| OS | visitorApiOs | The operating system name of the device which the visitor uses. |
| OS Version | visitorApiOsVersion | The operating system version of the device which the visitor uses. |
Once the variables you need are created, you can use them as trigger conditions in other tags.
Step 4: Create triggers for tags
When you create tags that needs the location and device as triggering conditions in Google Tag Manager, set the trigger conditions based on event “visitor-api-success” so that the tag will be trigger when the VisitorAPI tag successfully fetch the data, and set the trigger based on the variables. Below is an example of a trigger for visitors form the US only.
Step 5: Authenticate the domain
VisitorAPI authenticate the API calls based on calls’ referral domains. That means, before you use the API on a domain, you must put the domain in the VisitorAPI settings to open the API to accept requests from the domain. See Authentication documentation for details.
Common use cases
- GTM data enrichment — use visitor location and device data to enrich GTM tags and trigger region-specific campaigns